


Wear a Mickey Mouse hat you made yourself and go to Disneyland!
Pictures and Description

I made a Mickey Mouse bucket hat using Mickey Mouse fabric.
The new thing I made this time is a wide-open tulip-shaped hat.


 Cotton, Linen, Woven fusible interfacing
 Round elastic cord, Cord lock, Cotton ribbon


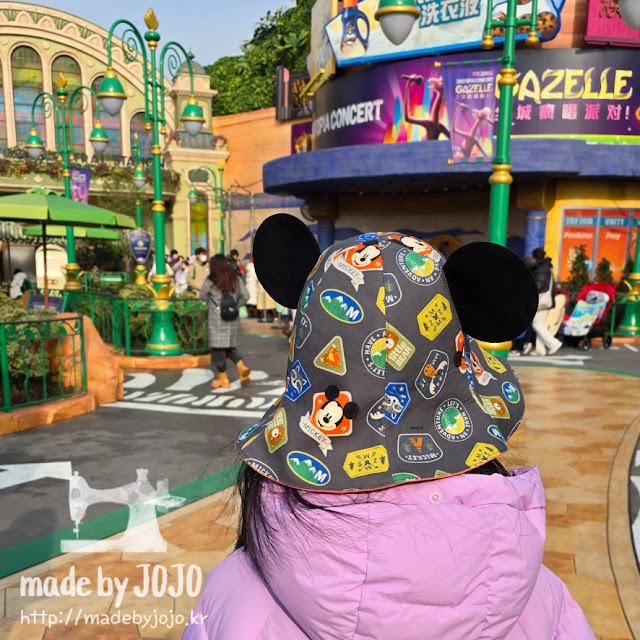
This is Shanghai Disneyland.

I went to Shanghai Disneyland wearing a Mickey Mouse hat I made myself.
I felt even better because I wore the same hat as my daughter.

I think toddlers will be so cute if they wear this when they go out.
My elementary school daughter was also really cute.

Judy, the main character of Zootopia, saw the hat and complimented it.

The new Zootopia attraction opened in December last year and is very popular.

I attached a hat string.
I will edit and upload the sling bag as soon as possible.
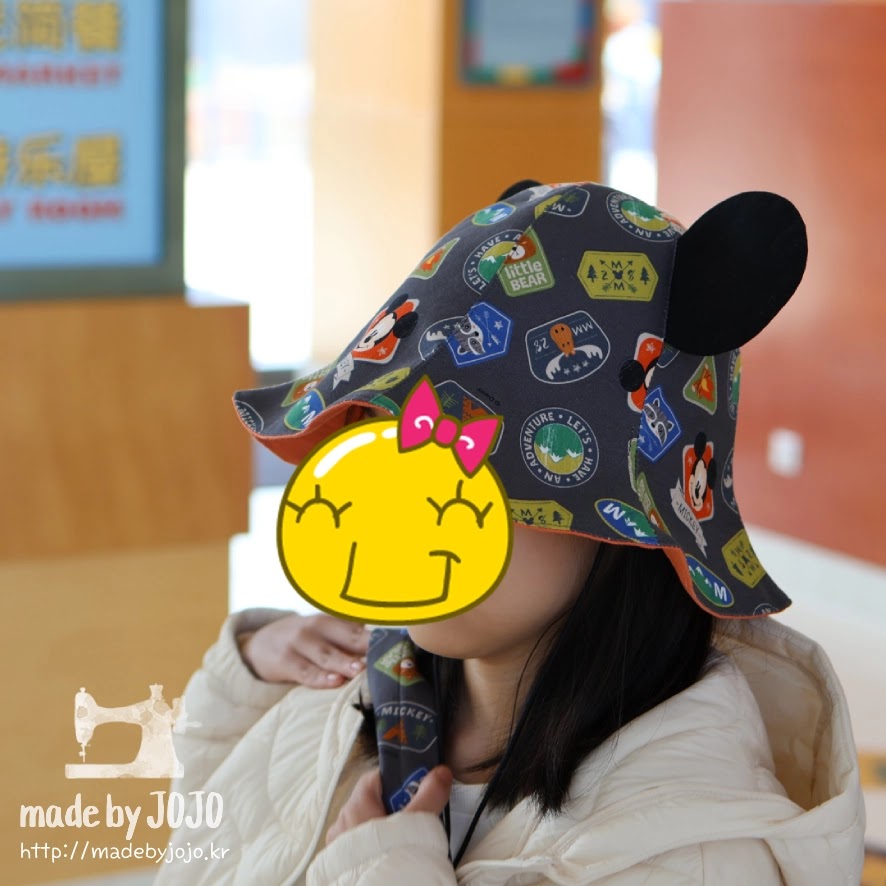
It's a pretty hat even if you make it without round ears, so try making it.
Materials

Prepare 6 sheets each of outer material, lining, and interfacing.
If you make a seam allowance at the bottom of the ear interfacing,
the ears will stand up well.
It is the right size for a head circumference of 58cm (22 13/16in).
56cm (22in) is 97%,
54cm (21¼in) is 94%,
For 52cm (20½in) is reduce by 91%.
The ears are pretty even without reducing them,
but if they seem too big, reduce them.
The pattern is on my YouTube channel.

How to make

1. Attach the interfacing at the wrong sides of outer fabric and ears.
2. Sew the ears right sides together only the seam line.
3. Turn inside out after clipping or notching and sew once more.

4. I will connect one ear to each of the three pieces of outer fabric.
Marks the location of the ears.
5. Fix and sew the ears between the outer fabric.
(Please sew the end of the ear interfacing slightly. Otherwise, the ears will not stand up well.)

6. Open the seam allowance on both sides
and sew once more to both sides of the ears.
7. Connect the remaining piece by sewing,
fold all seam allowances to one side, and sew.
8. Connect the remaining 3 pieces with the ears in the same way.

9. Sew the right sides of the three pieces of outer fabric together.
10. Fold the seam allowance to one side and sew once more on the right side.

11. Connect 3 pieces of lining at a time. Marks the location of the hat string.
12. Fold the cotton ribbon in half, fix it in place,
lay another piece of lining over it, and sew.
13. Fold the seam allowance to one side and sew once more on the right side.

14. Connect the remaining parts in the same way.
15. Complete the lining by sewing in the same way as the outer fabric.

16. Align the hat string location and ears, place the outer material and the lining.
17. Sew it leaving an opening, then turn inside out.
18. Make the shape well and sew around the edge.

19. Sew the hat string part once more.
20. Attach the hat string to the cord lock
and the Mickey Mouse bucket hat is complete.
Please check the video for a more detailed making process~^^