These are easy pouches made by attaching buttons with a sewing machine.
Pictures and Description
This is a really easy pouch to make.
The large pouch can hold one or two large sanitary pads.
When going out, it's good to simply put a few cosmetics such as cushion,
lip balm, hand cream, etc. and take it with you.
It can also be used to hold a mask.
This is great for storing small items like earphones,
handkerchiefs, medicines, accessories and more.
11 x 14cm (4⅜ x 5½in)
Materials
Size includes 1cm (⅜in) seam allowance.
It is a small pouch materials.
How to make
1. Measure the distance between the buttonholes,
select the zigzag pattern,
and adjust the stitch width to the buttonhole distance.
2. Push the feed dog control on the back of the machine to the right to lower the feed dogs.
(If you have a darning plate, use it.)
3. Replace with the satin stitch foot, place the button on the fabric
and lower the needle to see if it fits through the left buttonhole.
4. Sew about five to ten stiches and raise needle.
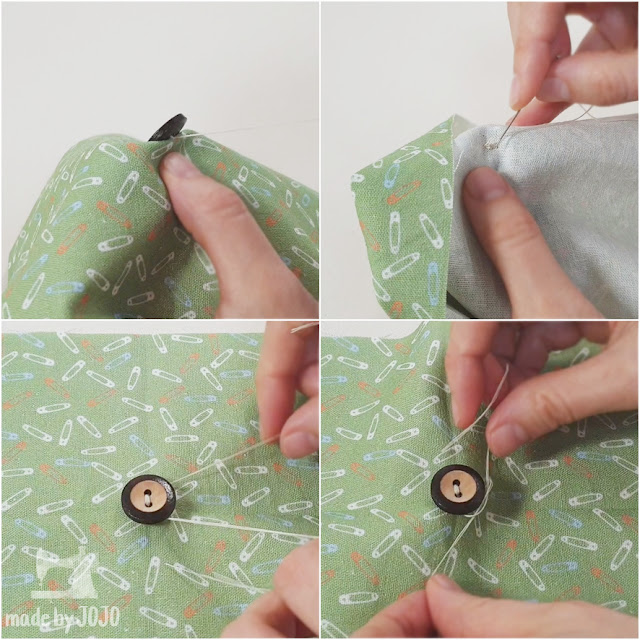
To strengthen the shank, cut the threads leaving a 20cm ( 8in) tail.
6. Wind it around the shank and knot.
7. Move the feed dog control back into place and move the hand wheel or pedal to raise the feed dogs. Select it to a straight pattern.
Auto-lock : Finish current pattern, then start sewing locking stitches.
If there is an auto-lock button, All you need to do is a zigzag stitch.
9. Fix the cord on the right side of the back body, lay them with the lining, and sew them.
10. Sew a buttoned front to the other side of the lining.
11. Fold the outer and lining fabrics together so that their right sides are touching,
and sew together leaving an opening on the lining side.
Open the seam allowance on both sides.
13. Turn inside out.
14. Fold the opening seam allowance inward and sew it closed.
15. Put the lining inside the outer fabric. Done.


_Cut_B.webp)


Should the measurement for the yellow fabric be doubled since it is folded?
ReplyDeleteThat's right. This is the measurement when folded in half.
DeleteI'm sorry for late reply.