♬ Trick or treat! Trick or treat! Give me something good to eat.
Pictures and Description
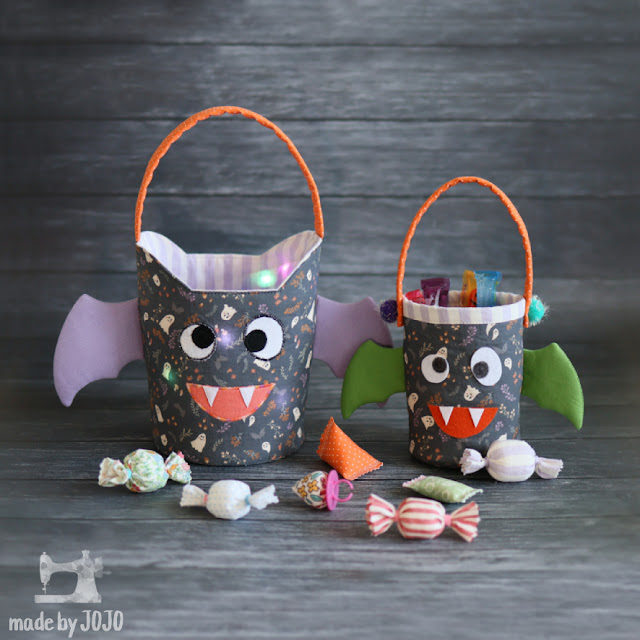
I made a bat-shaped Halloween candy basket that kids will love.
This isn't just any ordinary candy basket.
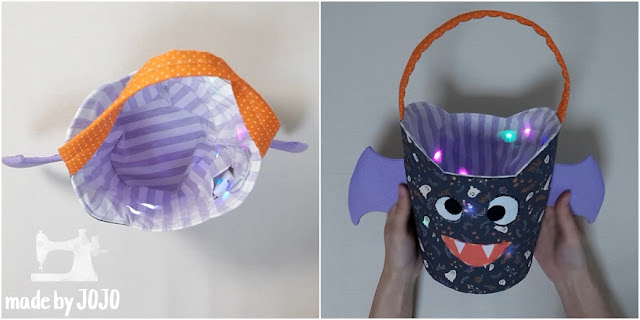
The light comes in like this
because an LED wire is inserted between the outer material and the lining.
Colorful and twinkling~~
At night, the bag shines beautifully.
But it might be very scary.
On the inside, there is a small pocket that can put the LED operation button.
Have fun with your kids with the LED bat candy bag!
Materials
Cotton, Non-woven fusible interfacing(4 oz)
The pattern is on my YouTube channel.
LED wire lights 1m, Self adhesive felt sheets, Glue stick, Safety pin, Needle, Thread
How to make
1. Attach the interfacing on the wrong sides of outer fabric.
2. Sew the wings, leaving an opening.
3. Clipping and notching, turn inside out.
4. Attach the eyes and mouth with glue stick and
sew around the perimeter by reducing the stitch width and length in a zigzag pattern.
5. The teeth were attached with adhesive felt,
and then the edges were sewn straight.
6. Put the wings between the outer and sew on the sides.
7. Clip the bottom and fold in half and mark the center.
8. Fold the bottom, mark each point, and connect with the body by basting.
9. I sewed it with a zipper presser foot.
the outer is ready.
1. 10. Now let’s make the lining. Sew only one side line.
11. I will make a tube for the LED wire.
Cross over the lining and position it.
12. Leave 0.5cm (3/16in) above and below the intersection and
sew with a 0.5cm (3/16in) seam allowance.
13. Place on the back of the lining,
fold both ends of (B) leaving 2cm (¾in) from the side line,
and secure with a pin.
14. Turn down (A) and sew the top of (B).
15. This time, lift (A) up and sew the bottom of (B).
16. Fold and secure the end of (A) like (B),
then sew except for the places sewn in number 12.
17. Sew the pocket for the LED control button.
18. Fold the lining in half and sew, leaving an opening and wire tube.
20. To make the handle, wrap the interfacing, fold it, and then sew.
21. Fix the top of the handle, turn the lining over,
put it inside the outer fabric, and sew.
22. Clip the top and turn them over through the opening.
23. Sew the top of bag.
24. Leave a wire tube and sew the opening.
25. Insert the LED wire into the tube using a safety pin.
It's easier if you turn it over.
28. Just put the LED control button in pocket.
It's done.
Check out the video for a more detailed process!!
Youtube
01:10 Dimensions
01:18 Materials
01:26 Attaching the interfacing
01:42 Making wings
03:02 Bat face
05:11 Sewing wings and body together
06:10 Sewing the bottom of the bag round
08:22 Lining
14:27 Handle
15:06 Sewing outer, lining, and handle together
18:12 Put the LED wire
19:17 Fabric Candy Making


